

How to Choose Cabinet Door Finishes for a Custom Project
A practical way to compare cabinet door styles, colours, surfaces and samples before approving a finish for kitchens, wardrobes or fitted storage.
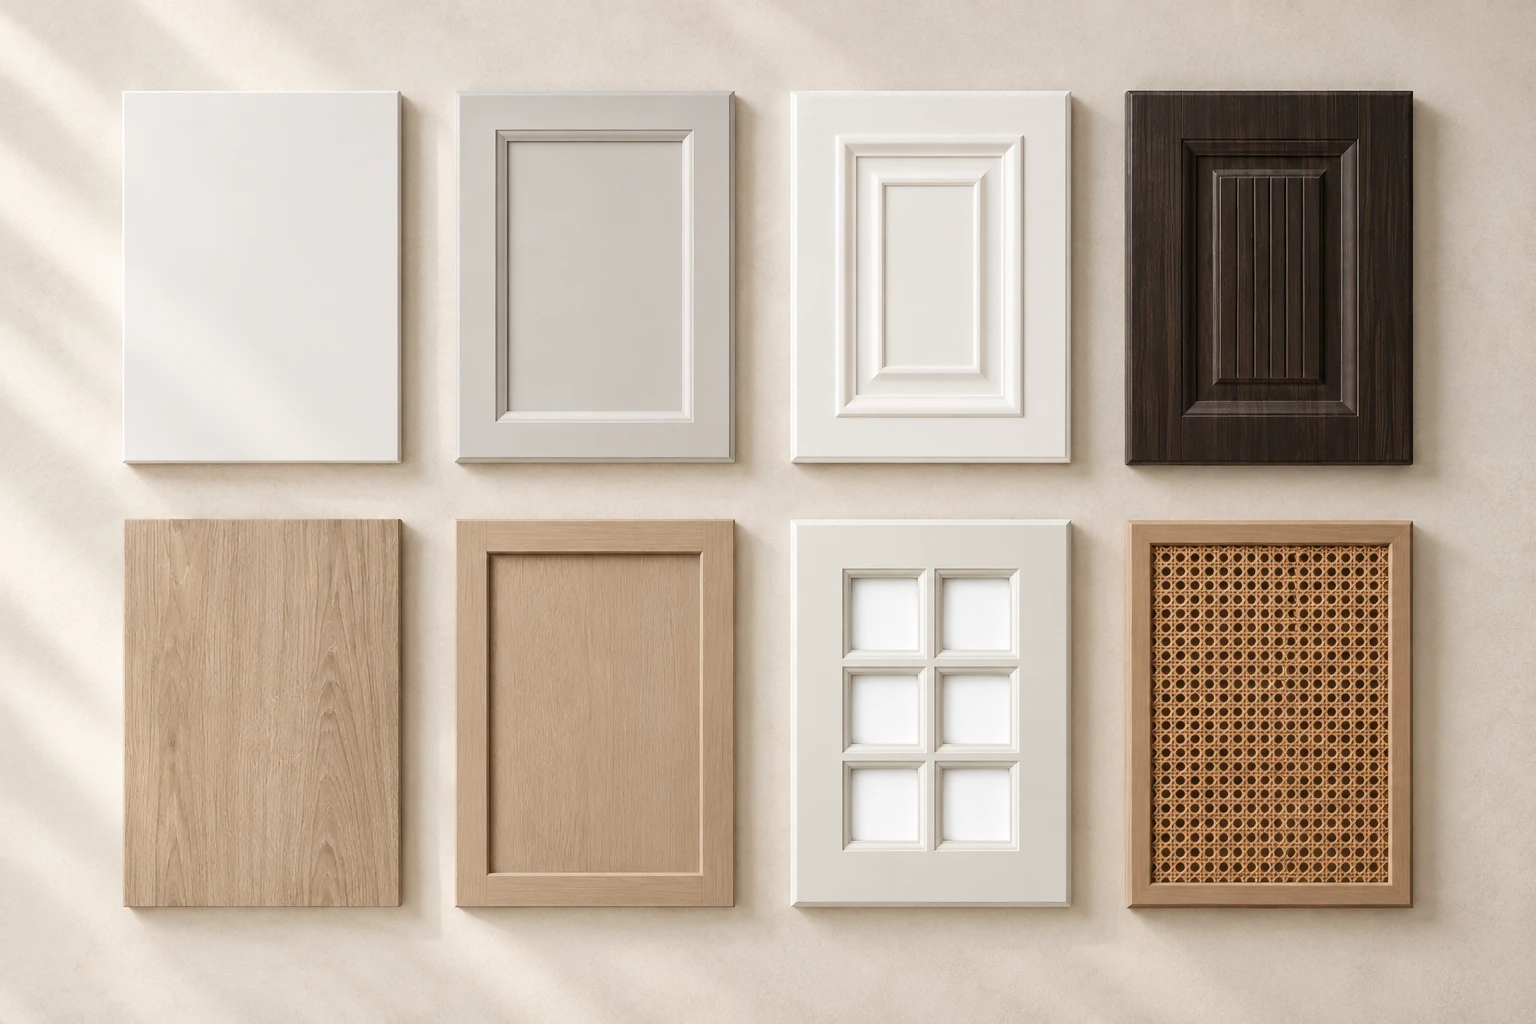
Choose a cabinet door finish by separating four decisions: the shape of the front, its visible surface, the edge treatment and the colour or grain. Ask for these choices to be recorded together. A reference image can start the conversation, but a named sample and an approved schedule should finish it.
The same photograph can be interpreted in several ways. One person may notice the oak colour, another the flat door, and another the low sheen. If the brief only says “like this image,” the quotation may be based on a different construction from the one you expected.
Begin with the door shape
For an example of a coordinated palette, the 2024 Bin-Max announcement describes how SNEJ connected doors, wall surfaces and cabinetry through PETG finish references. Treat a collection as a design starting point and confirm current samples for the products you select.
The door shape has a strong effect on the appearance and on how the front is made. A slab front is flat. A framed or routed front introduces rails, stiles, grooves or recessed areas. Glass, woven inserts and metal details add further components that need their own specification.
Start by choosing a door reference that is close to the required proportion. Then mark the details that matter: frame width, groove position, handle arrangement and whether adjacent panels should follow the same lines. On a tall bank of cabinets, small differences become much more visible when several doors sit side by side.
Door shape also affects where a finish can be used. A surface that suits a flat panel may not be the proposed solution for a deeply routed profile. Ask the supplier to confirm the available construction for the selected door rather than combining a profile and finish from separate photographs without checking compatibility.
SNEJ’s kitchen cabinet door references and wardrobe door references provide starting points for this discussion.
Separate the visible finish from the panel beneath it
Words such as “wood finish,” “painted” or “laminate” describe broad directions. They do not establish the complete cabinet-front specification. Ask what panel or frame sits beneath the surface, how the edges are treated and whether the finish applies to one face or all visible faces.
This distinction matters when comparing quotations. Two fronts can look similar in a small image while using different materials, edge details or production methods. Record each proposal in a comparison sheet instead of comparing only the colour name.
| Decision | What to record |
|---|---|
| Door reference | Profile or model code, dimensions and any changes from the reference |
| Base construction | Proposed panel or frame material and thickness |
| Visible surface | Finish family, colour or pattern code, grain direction and sheen |
| Edges and rear face | Edge treatment, rear-face finish and treatment of exposed ends |
| Approval reference | Physical sample code, date and the rooms or product groups it covers |
Do not infer performance from appearance. If the project has requirements for moisture, cleaning, fire performance or emissions, state them separately and ask for the relevant documentation for the proposed material and destination.
Decide where the finish repeats
A finish schedule should show more than one sample. It should show where that sample will be used.
Mark whether the selected finish applies to kitchen base units, wall units, tall units, wardrobe fronts, interior doors or fitted wall panels. List exceptions such as an island in a contrasting colour or glazed sections within a wardrobe. This prevents a general note such as “oak throughout” from being applied to the wrong components.
For wood grain and directional patterns, add the intended grain direction. Confirm how the pattern should run across individual fronts and whether adjacent panels need to read as one composition. Natural variation or repeat patterns should be discussed before approval, especially when a wide surface is made from several panels.
For a coordinated interior, review the finish beside nearby materials rather than in isolation. Flooring, worktops, wall colour, metal trims and lighting can change how a cabinet sample reads in the room.
Use physical samples at the approval stage
Screens change colour. Cameras change it again. A catalogue image is useful for reducing the options, but it should not be the only approval record for a project where colour and texture matter.
Ask for the current sample reference and check it under more than one light condition. View it vertically if it will be installed as a door. Place it beside the proposed worktop, wall material or floor sample when those relationships are part of the design.
Photograph the approved sample for the project record, but keep the sample code and written approval as well. The photograph helps identify the decision later; it does not replace the physical reference.
When several people approve finishes, identify who can give the final instruction. A trail of comments from different email threads can leave two versions appearing current.
Check the details around the front
The chosen door does not work alone. Handles, finger pulls, hinges, drawer runners, lighting and adjacent fillers affect both appearance and use. Ask for these items to be shown on the drawings or schedule where they influence the front.
Check the gaps between doors and drawers, the treatment at walls and ceilings, and the junction between different finishes. For handleless designs, confirm the proposed opening detail. For integrated appliances, confirm the appliance model and the required cabinet front arrangement before approving the relevant elevation.
Interior doors need their own review. A cabinet door reference should not be assumed to provide the same construction, frame detail or hardware as an interior door system, even when both use a similar colour.
Build a finish approval sheet
A short approval sheet is easier to check than a long chain of messages. Use one row for each distinct finish and include:
- the product and room or unit type;
- the door or panel reference;
- the material, colour and sheen references;
- grain direction and edge treatment;
- related hardware or handle reference;
- sample status and approval date;
- drawing revision affected by the decision.
Update the sheet when a finish changes. If the change affects price, drawings or timing, ask for those consequences to be recorded before the replacement is approved.
Common questions
Can one finish be used across kitchens, wardrobes and doors?
It can be a shared visual direction, but each product needs a compatible construction and its own confirmed sample. Similar colour names do not prove that separate materials will match exactly.
Can I approve a colour from a website image?
Use website images to shortlist options. For final approval, ask for a current physical sample or another agreed control reference. Record the sample code and where it will be used.
What if the project has not selected a finish yet?
Send a few annotated references and explain what you like in each one. The first quotation can state a proposed finish and its assumptions. Replace that allowance with an approved specification before production.
Prepare the finish discussion
Choose the closest door reference, collect the surrounding material samples and list every room where the finish should appear. Send those items with the project drawings through the enquiry form, and mark decisions that are still provisional.